One useful tool for enabling remote computer operation and connection is a remote desktop. A feature built into Windows Server allows administrators to access and manage the server remotely.
We will cover how to set up and configure the remote connection using Remote Desktop and connect to your Windows server in this blog post. We will additionally discuss the various applications and instruments accessible for establishing a server connection. Along with typical problems that could occur when a system administrator, network administrator, or regular user needs to establish a remote connection to a server.
How to Use Remote Desktop to Access Your Windows Server
Step 1: Enable Remote Desktop on Your Server

You must first enable remote desktop access on your server in order for it to accept connections from other computers before you can use a remote desktop to access it. Take these actions to accomplish this:
-
-
- Open the System Properties: Go to the Start Menu, click “Run”, type “sysdm.cpl”, and press Enter. This will open the System Properties dialog box.
- Go to the Remote Tab: Go to the “Remote” tab in the System Properties dialog box.
- Enable Remote Desktop: In the Remote tab, select “Allow remote connections to this computer”. This option enables Remote Desktop connections on the server.
- Click OK.
-
Step 2: Determine the IP Address of Your Windows Server
To use a remote desktop to access your server, you must know its IP address. An exclusive identification that indicates the server’s location on the network is its IP address. Use these procedures to determine your server’s IP address:
-
-
- On your Windows server, open the Start Menu and type “cmd” in the search bar.
- Click on “Command Prompt” in the search results.
- In the Command Prompt, type “ipconfig /all” and press Enter.
- Look for the “IPv4 Address” line. The number next to it is the IP address of your server.
-
There are a few things you must do to make sure your Remote Desktop connection to your server works if you are using a public IP address.
Step 3: Download and Install a Remote Desktop Client
Next, on the PC you wish to use to access your server, you must download and install a remote desktop client. A software program called a remote desktop client lets you connect to and manage a computer from a distance. There are numerous remote desktop applications available, such as Microsoft Remote Desktop, which is available from the Microsoft Store for free.
Step 4: Connect to Server Using Remote Desktop
You can establish a remote desktop connection to your server now that you have enabled remote desktop and know its IP address. Through the Remote Desktop Protocol, computers running remote desktop applications can connect to and manage another server remotely (RDP). Take these actions to accomplish this:
-
-
- Open the Remote Desktop Connection app on the computer or device you want to use to connect to the server. This app is built into Windows, and you can find it by searching for “Remote Desktop Connection” in the search bar.
- In the Remote Desktop Connection app, enter the server’s IP address or the server’s hostname.
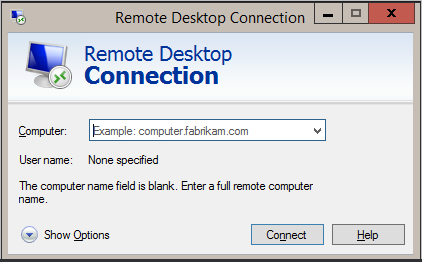
- Click Connect.
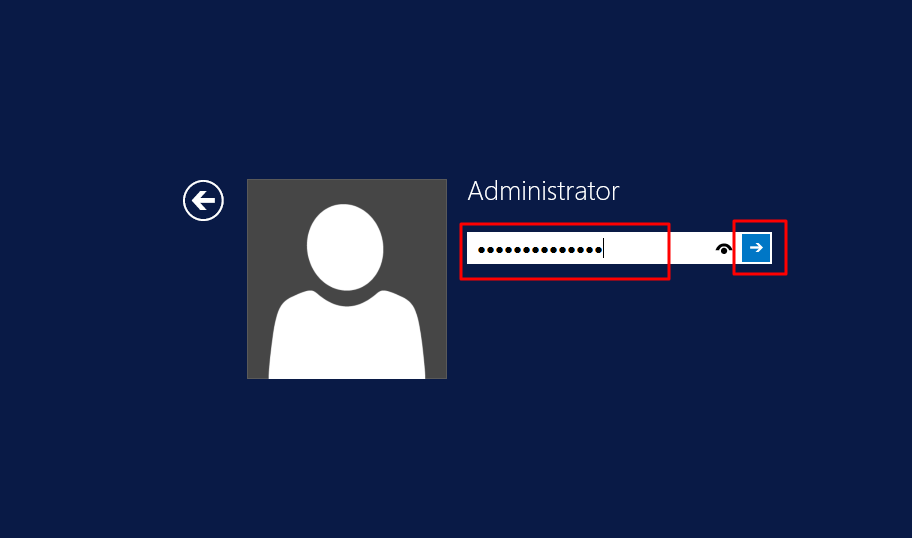
- You will be prompted to enter your login credentials for the server. Enter the username and password for an account on the server that has been added to the Administrators group.
- You should see a pop-up window with a remote session to the server if everything is set up correctly.
-
Supported Operating Systems
With the help of the Microsoft Windows operating systems’ Remote Desktop feature, users can connect to a remote computer and take control of it just like they would if they were working locally. The operating systems that enable remote desktops are as follows:
-
-
- Windows 10: All Windows 10 editions, including Home, Pro, Enterprise, and Education, support Remote Desktop.
- Windows 8.1: Remote Desktop is supported in all editions of Windows 8.1, including Home, Pro, Enterprise, and RT.
- Windows 7: The Professional, Enterprise, and Ultimate editions of Windows 7 all come with Remote Desktop.
- Windows Server: All server editions, including Windows Server 2016, Windows Server 2012 R2, Windows Server 2012, and Windows Server 2008 R2, support remote desktop.
- Mac OS X: With the Microsoft Remote Desktop software, which is available from the Mac App Store, Mac users can establish Remote Desktop connections with Windows PCs.
-
Remember that the remote computer’s operating system needs to have Remote Desktop enabled. It is necessary for the user connecting to the remote computer to have the appropriate permissions. The local computer also has to have the Remote Desktop software installed.
Step 5: Adjusting Remote Desktop Settings
You can tweak a few settings to personalize your experience after establishing a remote desktop connection with the server. Take these actions to gain access to these settings:
-
-
- In the Remote Desktop Connection, click on Show Options.
- In the Options tab, you can adjust various settings, such as the display size, color depth, and sound options.
- You can configure options such as port forwarding and network-level authentication in the Advanced tab.
- Make any desired changes and click Connect to save the changes.
-
Step 6: Adding Users to the List of Allowed Users
By default, only one user at a time may establish a remote desktop connection to the server. You need to add users to the allowed user lists if you want more than one user to connect to the server at once. Take these actions to accomplish this:
-
-
- On the server, open the Control Panel.
- Click on System and Security.
- Click on System.
- In the left-hand panel, click on Remote Settings.
- In the Remote Desktop section, select the “Advanced” tab.
- Click on “Select Users”.
- In the Remote Desktop Users window, click on “Add Users”.
-
Step 7: Troubleshooting Common Issues
There are a few typical problems you can troubleshoot if you are experiencing difficulties establishing a remote desktop connection to your server.
-
-
- Incorrect IP address: Verify that the IP address you entered for your Windows server is correct. To find the IP address, use the server’s Command Prompt.
- Network connectivity: Verify that the computer or other device you are using to connect to the server is a part of the same local network as it is. Make sure you have a reliable internet connection if you are connecting from a remote location.
- Firewall: Make sure the remote desktop connection is not being blocked by your firewall. To make sure that remote desktop connections are permitted, you can verify your firewall settings.
- Remote Desktop Services: Verify that the Windows server’s Remote Desktop Services are up and running. Use these procedures to see the Remote Desktop Services’ current status:
- Open the Control Panel on the Windows server.
- Click on System and Security.
- On Administrative Tools, click.
- Select Services.
- Locate the Remote Desktop Services and ensure that it is running.
- Remote settings: Make sure the Windows server has remote desktop enabled and that the computer or device you are using to connect to the server is authorized to do so. Use the procedures listed in Step 1 to check the settings.
-
Securing your Windows server

A security certificate verifies the authenticity of a website and establishes an encrypted connection between the client and the server. Before granting a certificate, a certificate authority (CA), a trustworthy outside agency that certifies websites and servers, verifies the legitimacy of the server.
A client receives the certificate when it establishes a connection with a website or server that has one. Next, the client’s operating system or browser confirms that the certificate is legitimate and was issued by a reputable CA. If the certificate is legitimate and reliable, the client can create an encrypted connection with the server or website.
Windows Servers can have their Remote Desktop connections secured with a certificate. During the establishment of a remote desktop connection, the certificate encrypts the data sent between the client and the server. This keeps eavesdropping and data manipulation at bay, helping to ensure that personal information stays private.
To use a certificate with Windows Server Remote Desktop, you need to install one on the server from a trusted CA. You can also use a self-signed certificate for testing. This is not recommended, though, as production settings do not automatically trust self-signed certificates.
Step to Enable Remote Desktop with a Certificate
After installing the certificate on the server, you can set up Remote Desktop to use the installed certificate. Take these actions to accomplish this:
-
-
- Open the Control Panel: Go to the Start menu and type “Control Panel”. Click on the option in the search results to open it.
- Enable Remote Desktop: Click “System and Security” and then click “System”. Click on the “Remote Settings” tab in the System Properties window. Click the “Allow remote connections to this computer” checkbox to enable Remote Desktop.
- Configure the Remote Desktop connection: Open the Remote Desktop Connection client on your local computer. Click on the “Options” button and then click on the “Advanced” tab.
- Add the certificate: Click on the “Settings” button in the Advanced tab and select the “Use these RD Gateway server settings” option. Enter the server’s hostname or IP address in the “Server name” field, and select the security certificate from the “Certificate” drop-down menu.
- Connect to the server: Click the “Connect” button to establish a remote desktop connection to the server using the certificate.
-
Remote Desktop with a certificate encrypts sensitive data during remote connections. Additionally, it helps to shield the server from unauthorized access and man-in-the-middle attacks. If you’re using Remote Desktop in a production environment, you should use a certificate for enhanced security.
Using Microsoft Remote Desktop (Mac OS X versions 10.9 and later)
If you connect to your Windows server from a Mac OS or Windows-based computer, the procedure is the same as the ones described above. To connect to the server, you’ll need to use the Remote Desktop Connection client and have the server’s IP address.
You can use the Microsoft Remote Desktop app, which is available from the App Store, to connect from a Mac OS computer. Thus, you can use the integrated Remote Desktop Connection client when logging in from a Windows computer. Thus, these are the actions:
-
-
- Download and install the Microsoft Remote Desktop app from the Mac App Store.
- Launch the Microsoft Remote Desktop app and click the “+” button in the top left corner to add a new connection.
- Enter the name of the remote computer you want to connect to and its IP address or hostname. This allows you to designate the user account that you wish to use for the connection.
- Click “Save” to save the connection information.
- Double-click the connection you just created to start the Remote Desktop session.
- Then, Enter your login credentials when prompted, then click “Connect”.
- You will now be connected to the remote computer and can access and control it as if you were working directly.
-
It’s easy and safe to manage and maintain your Windows server remotely with Microsoft Remote Desktop for Mac OS X. You can access and control your server from anywhere.
Conclusion
In conclusion, connecting to a Windows server via Remote Desktop can be a helpful tool for controlling, maintaining, and operating the system remotely.
As a result, You can effortlessly connect to your Windows server from any remote location by following the instructions in this guide, and you can carry out a variety of tasks as if you were physically present on the server. Additionally, Remote Desktop gives you a practical and safe way to access and manage your server remotely, allowing you to work faster and more efficiently.
Lastly, you can greatly increase your ability to manage and service your Windows server from any location by learning how to use a remote desktop effectively.